Issues during setup and possible solutions
I get an error message when scanning the device
There are three possible error messages that may occur:
-
The user has scanned a completely different QR code, either by misunderstanding what should be scanned or accidentally capturing a different code within the camera's focus area (sensitive to distance). Solution: Ask the user to try again and ensure that the correct QR code is scanned.
-
The user has scanned a QR code that belongs to the cardboard box in which the device was delivered, and this does not match the QR code on the actual EcoMonitor device (applies to older deliveries, gives an error message indicating it is a pilot device). Solution: Ask the user to try again and ensure that the correct QR code is scanned.
-
The user scans a device that is already associated with another user. This results in an error message, but it can only be resolved by removing the previous ownership, which is done by us upon request through support@harktech.no. Solution: Either remove the existing ownership or inform the user about the sharing functionality under device settings (if they are in the same household).
I am sure that the Network Name/SSID and the associated password are correct, but the setup process does not complete
Cause 1: Network Name or password contains special characters, typically such as æ, ø, å, or other characters not included in the following:
! " # $ % & ' ( ) * + , - . / 0 1 2 3 4 5 6 7 8 9 : ; < = > ? @ A B C D E F G H I J K L M N O P Q R S T U V W X Y Z [ \ ] ^ _ ` a b c d e f g h i j k l m n o p q r s t u v w x y z { | } ~
Possible solutions:
- Switch to another network if applicable (Read how below under "Possible solutions")
- Change network details to exclude special characters
- Use manual setup (Read how below under "Possible solutions")
Cause 2: Occasionally, the error message may appear even when everything is correctly entered.
- It usually resolves itself if the user clicks "try again" with the same login details.
Cause 3: Switching between wireless networks during the connection process may result in the EcoMonitor network connection being broken, especially when using mobile data.
- Turn off mobile data and try again
- Try connecting with another mobile device (or possibly another computer if the manual method is required)
I get an error message when connecting to the wireless network
The error message usually occurs when the login details are incorrect. This can be due to incorrect input or, for example, inadvertently activating caps lock or automatic capitalization. In addition, in rare cases, navigating away from the app (to retrieve login details from an external document or password service) may cause certain discrepancies. We recommend not leaving the app on the connection screen.
I click to synchronize (connect to EcoMonitor through the wireless network set up by the device), but I get an error message
Synchronization will fail if EcoMonitor's own network goes down (e.g., due to power loss to the device) or if the phone is set to avoid networks that are not connected to the internet.
Solution: Ensure that the monitor unit has a power supply (it will then emit a constant blue light on Wi-Fi devices). Additionally, mobile data can be temporarily turned off.
Changing WiFi network/resetting to setup mode
Changing WiFi Network
To change the network, the device must be reset to setup mode. Then, the device can be set up again with a new wireless network by going to "My devices" in the app and accessing the device settings. Click on "Set up again" and follow the instructions.
The device does not enter setup mode
- Is it connected via USB? If not, try that first.
- Is the light red? In that case, the device needs to be reset (see below)
Setting up the device again/resetting to setup mode
- Connect the device to a USB charger with a USB cable (micro-USB).
- Press and hold the small, round button between the contacts.
- Continue to hold the button and observe the device emitting a constant white light.
- When the device emits a green light, release the button (this takes about 5 seconds).
- The device should now emit a constant blue light when the button is not pressed.
- The device can now be set up with a new wireless network. Go to "My devices" in the app and access the device settings, then click on "Set up again" and follow the instructions.
Resetting the device to factory settings
- Connect the device to a USB charger with a USB cable (micro-USB).
- Press and hold the small, round button between the contacts (make sure the device emits a constant white light).
- Do not release the button even if the device emits a green light (after about 5 seconds), but keep holding it for about 25 seconds (about 30 seconds in total), and the device will turn off and be reset.
Everything seems to be set up correctly, but no data is coming into the app
For various reasons, the HAN port may not be opened, despite assurances from the DSO that it is. Users of the dashboard can check if the "HAN data" field shows any activity. If it says "Ikke sett" in this field, it may indicate that the HAN port is not open.
Manual WiFi setup
This method is slightly more complicated but almost always works. Therefore, it is often the last backup solution if all other attempts to handle discrepancies fail. It involves manually connecting to EcoMonitor's own network and then going to the IP address http://192.168.1.1/ and following the steps there.
*Note: The device must be connected to power before starting this process, and it should emit a constant blue light. If it does not emit a constant blue light even with power supply, it can be manually set to setup mode (see above).
- Go to network settings on a mobile phone or laptop and find the list of available wireless networks. Click on the network labeled EcoMonitor_xxxxxxxx to bring up the password dialog box.
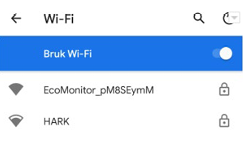
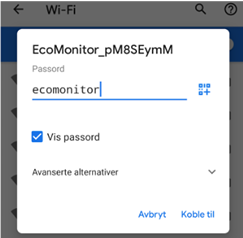
- Network password dialog box. The password must be 'ecomonitor' in lowercase.
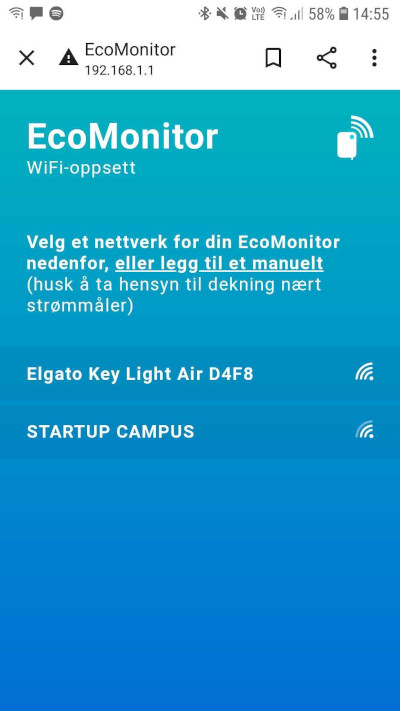
- Next, you need to go into a web browser and enter the address above. This is the monitor's own page (it does not connect to the internet) and is completely safe.
- The page set up by the local network. Here, the networks detected by the device will appear in a list sorted by coverage conditions (illustrated in the icon to the right of each network). You must select the correct network and preferably consider the coverage conditions near the electricity meter. Only networks on 2.4GHz will be displayed.
- After selecting the network, you need to enter the correct password. You can cancel and go back to the list of networks if you want to choose another one.
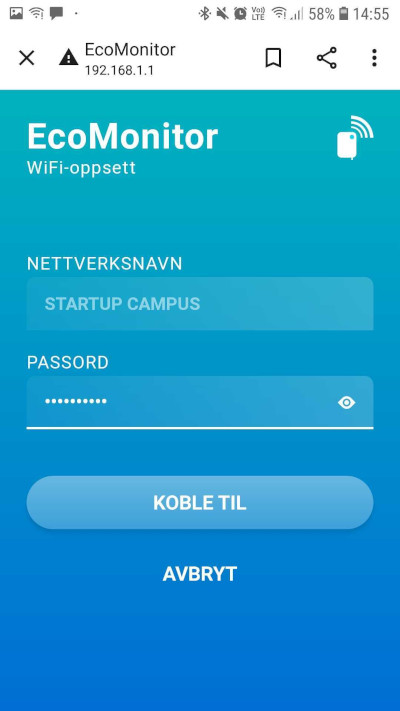
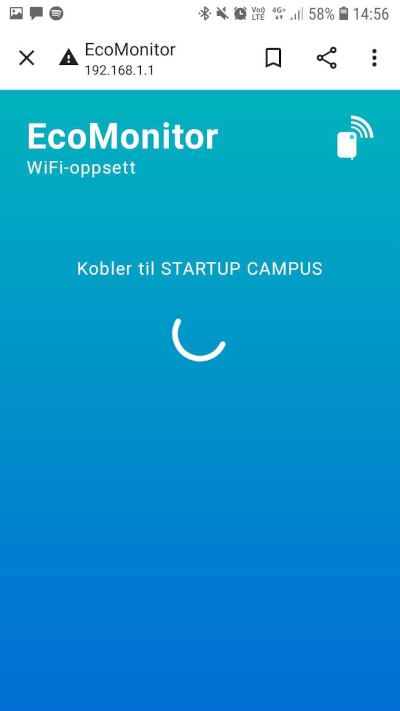
- Connecting to the network. This may take some time (but never more than 30 seconds). If you receive an error message but are reasonably sure that the password was correct, you can try again (sometimes the connection may time out and trigger the error message).
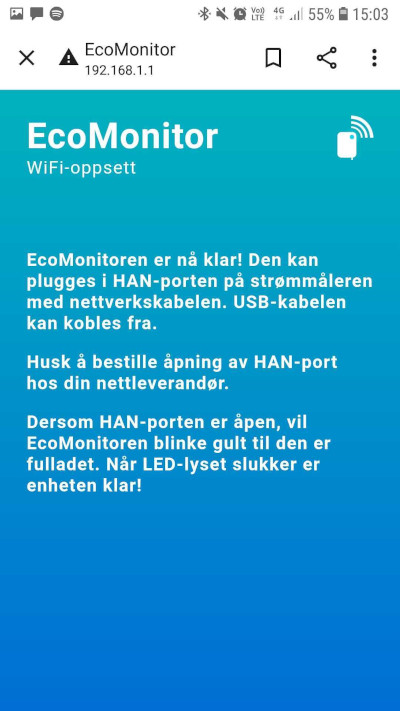
- Upon successful connection, you have the option to click "complete" to finish the setup or go back to the list of networks to choose another one.
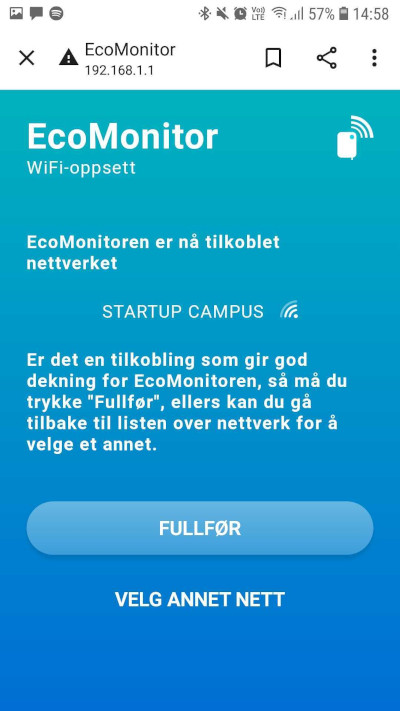
- When the setup is complete, everything is ready to connect the device to the HAN port (which must be open).
